Pre-Requisites
Before adding an Azure scan, ensure that the user performs the following steps have the necessary permissions to:
- create an Azure Active Directory App Registration. The user needs to be able to grant admin consent for Default Directory
- create custom roles in subscriptions. The user has to be either an Owner or a User Access Administrator for the subscription.
Setting up Azure AD Application
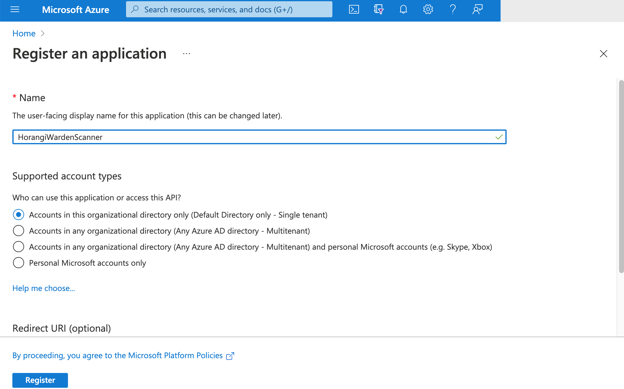
- Login to your Azure Portal and navigate to the Azure Active Directory to create an application. If you have already created an Azure AD application from a previous integration, you can use the same application.
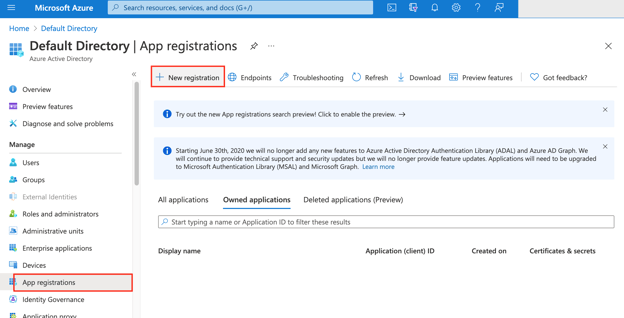
- Select App registrations and then click on New Registration.
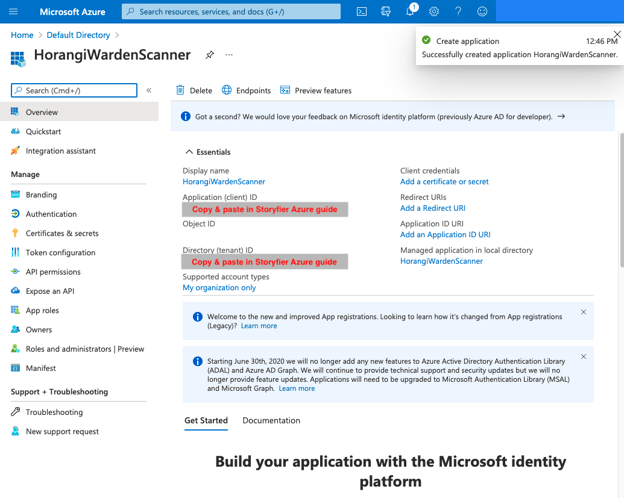
3. Copy the Application (client) ID, and Directory (tenant) ID, and paste them below.
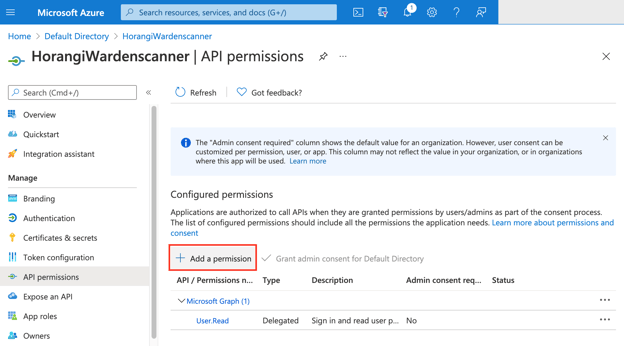
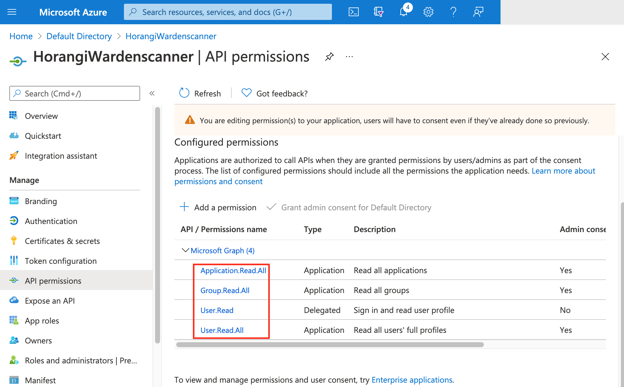
4. Navigate to API permissions and click on Add a permission.
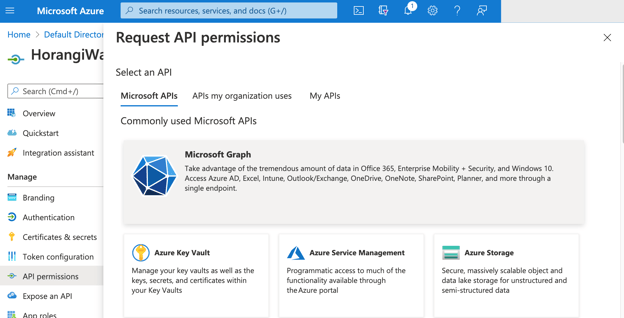
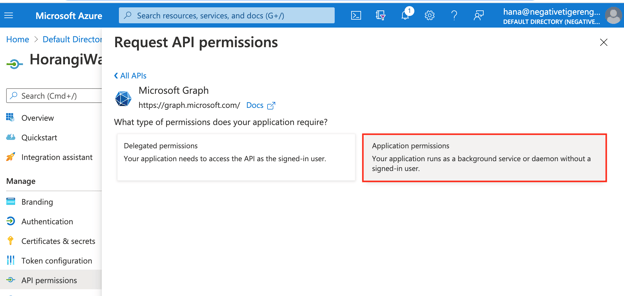
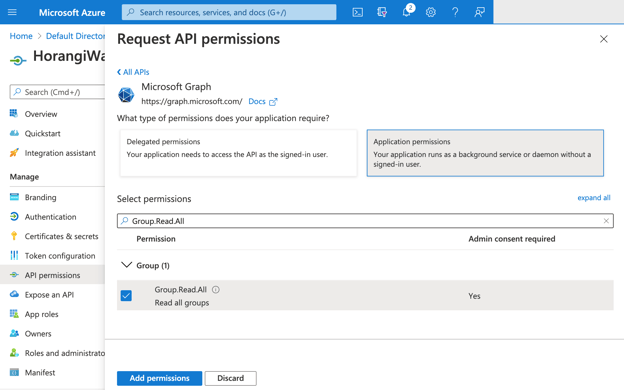
5. Select Microsoft Graph under Microsoft APIs and select Application permissions
-
- User.Read.All
- Group.Read.All
- Application.Read.All
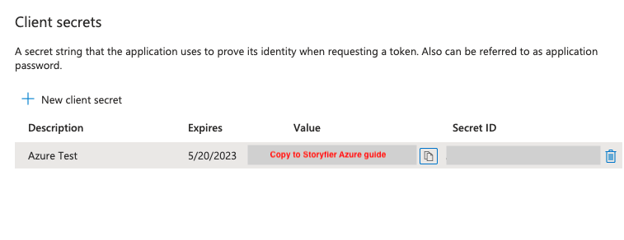
9. Navigate to Certificates & secrets and then click on New client secret.
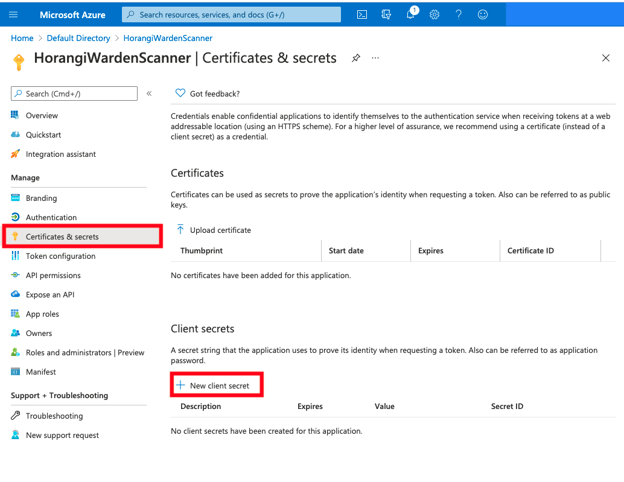
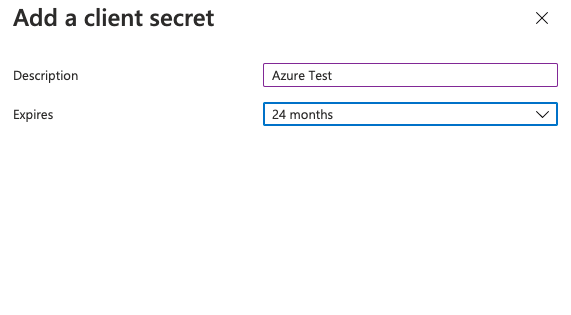
11. Copy the value of the client secret and paste it below.
- Navigate to Azure Active Directory > Enterprise applications and select your application. Take note of the Object ID value, this is used in the next step.

2. Navigate to the Subscriptions service. Copy the Subscription ID of the target subscription and paste it below.
Setting up Custom Role for Subscription
ARM Template
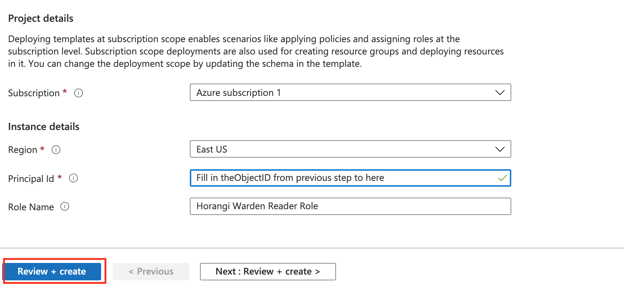
- Click the Deploy to Azure button below to assign the correct permissions to your application.
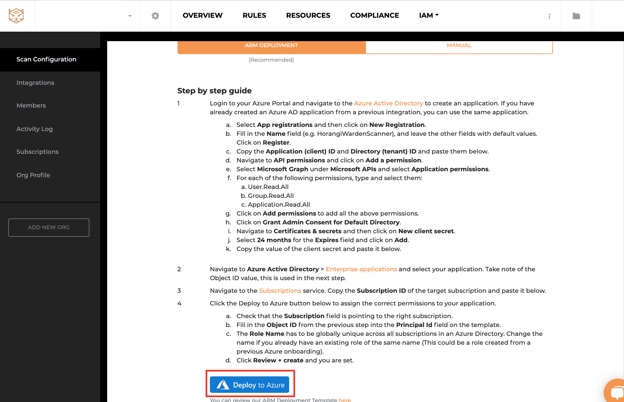
a. Check that the Subscription field is pointing to the right subscription.
b. Fill in theObject ID from the previous step into thePrincipal Id field on the template.
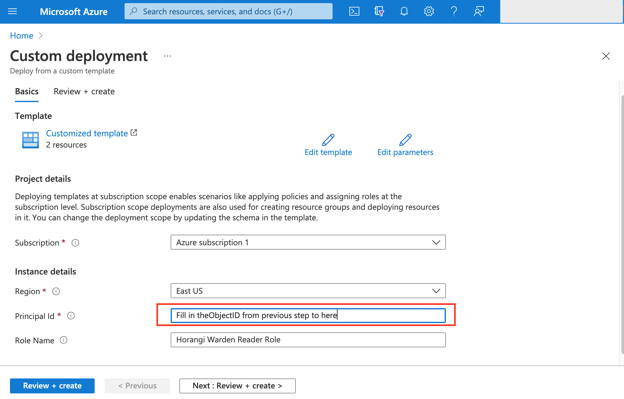
c. The Role Name has to be globally unique across all subscriptions in an Azure Directory. Change the name if you already have an existing role of the same name (This could be a role created from a previous Azure onboarding).
d. Click Review + create and you are set.
Manual
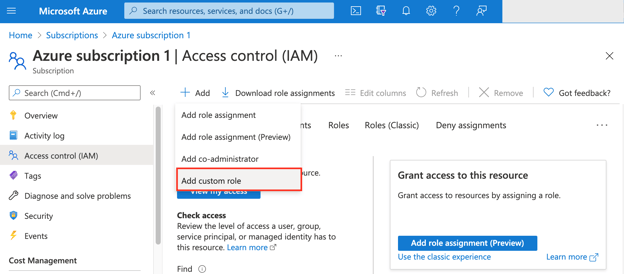
- Click on the target subscription. We will be creating and assigning a custom role.
a.Navigate to Access Control (IAM) and click on Add > Add custom role.
b. Under the Basics tab, fill in the Custom role name field (i.e. HorangiWardenRole).
c. The Role Name has to be globally unique across all subscriptions in an Azure Directory. Change the name if you already have an existing role of the same name (This could be a role created from a previous Azure onboarding).

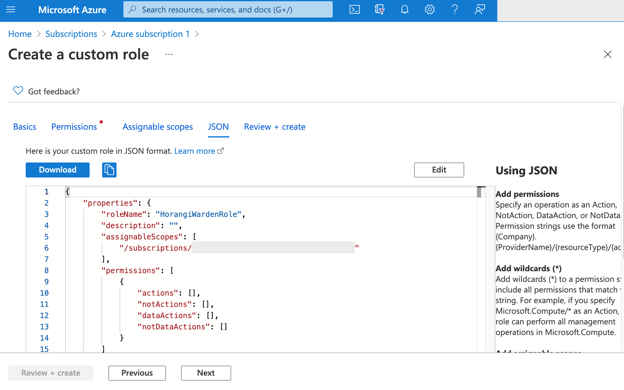
d. Click on the JSON tab and click on Edit and paste the content from the file here.
f. Click Review + create and click Create.
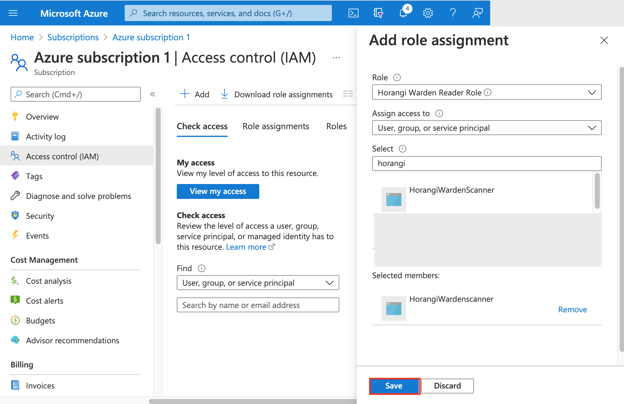
g. Navigate again to Access Control (IAM) and click on Add > Add role assignment.

i. Under the Assign access to dropdown, select User, group, or service principal.
j. Under the Select dropdown, select the name of the Application we created previously (e.g. HorangiWardenScanner).
k. Click on Save.