If you want to see your scan results in JIRA, please follow these steps:
Note: Horangi Warden only supports JIRA cloud version at the moment; and not data center version
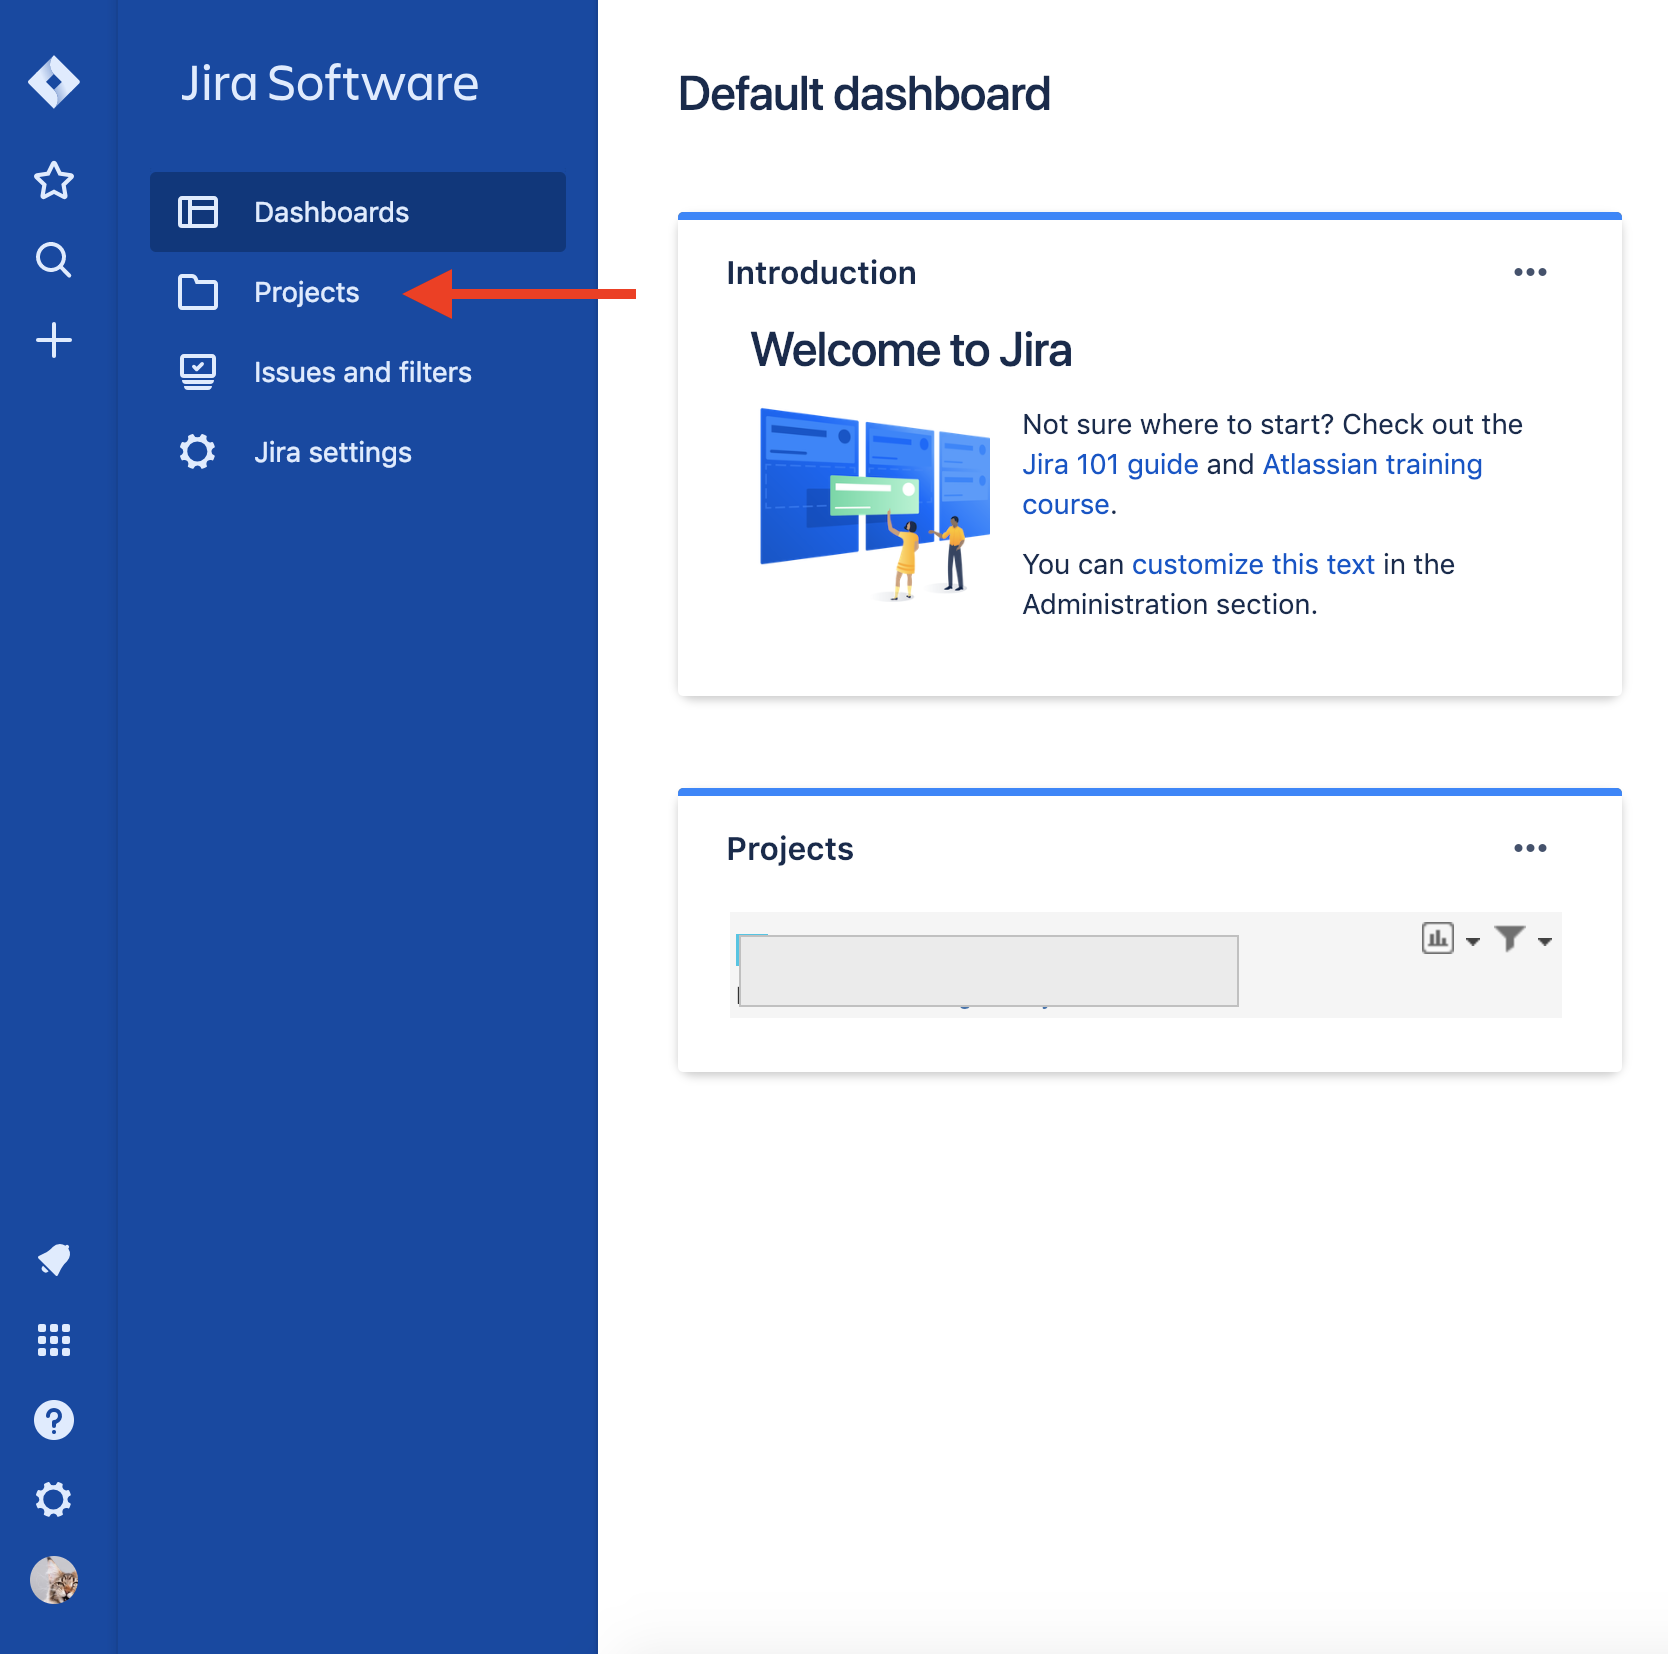
1. Once you have logged in to JIRA, click on the Projects located on the navigation menu on the left.
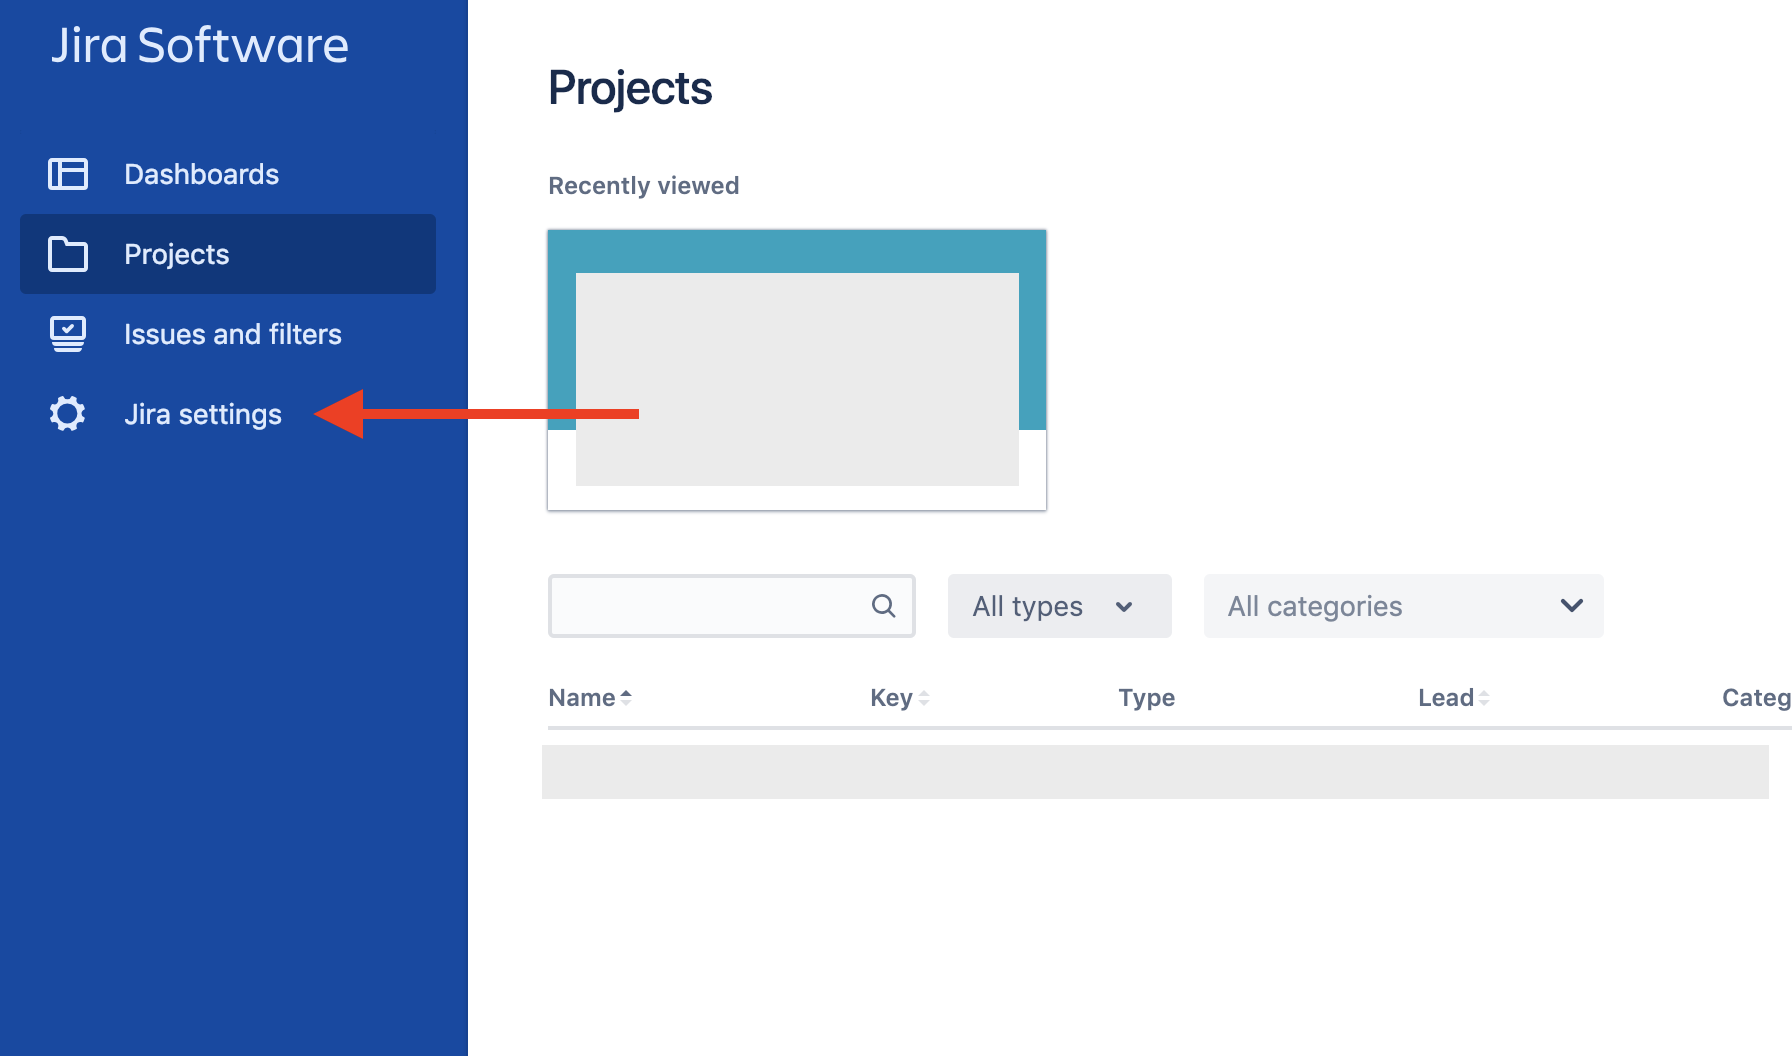
2. Click on Jira Settings located on the navigation menu on the left.
3. Click on Products located on the navigation menu on the left.

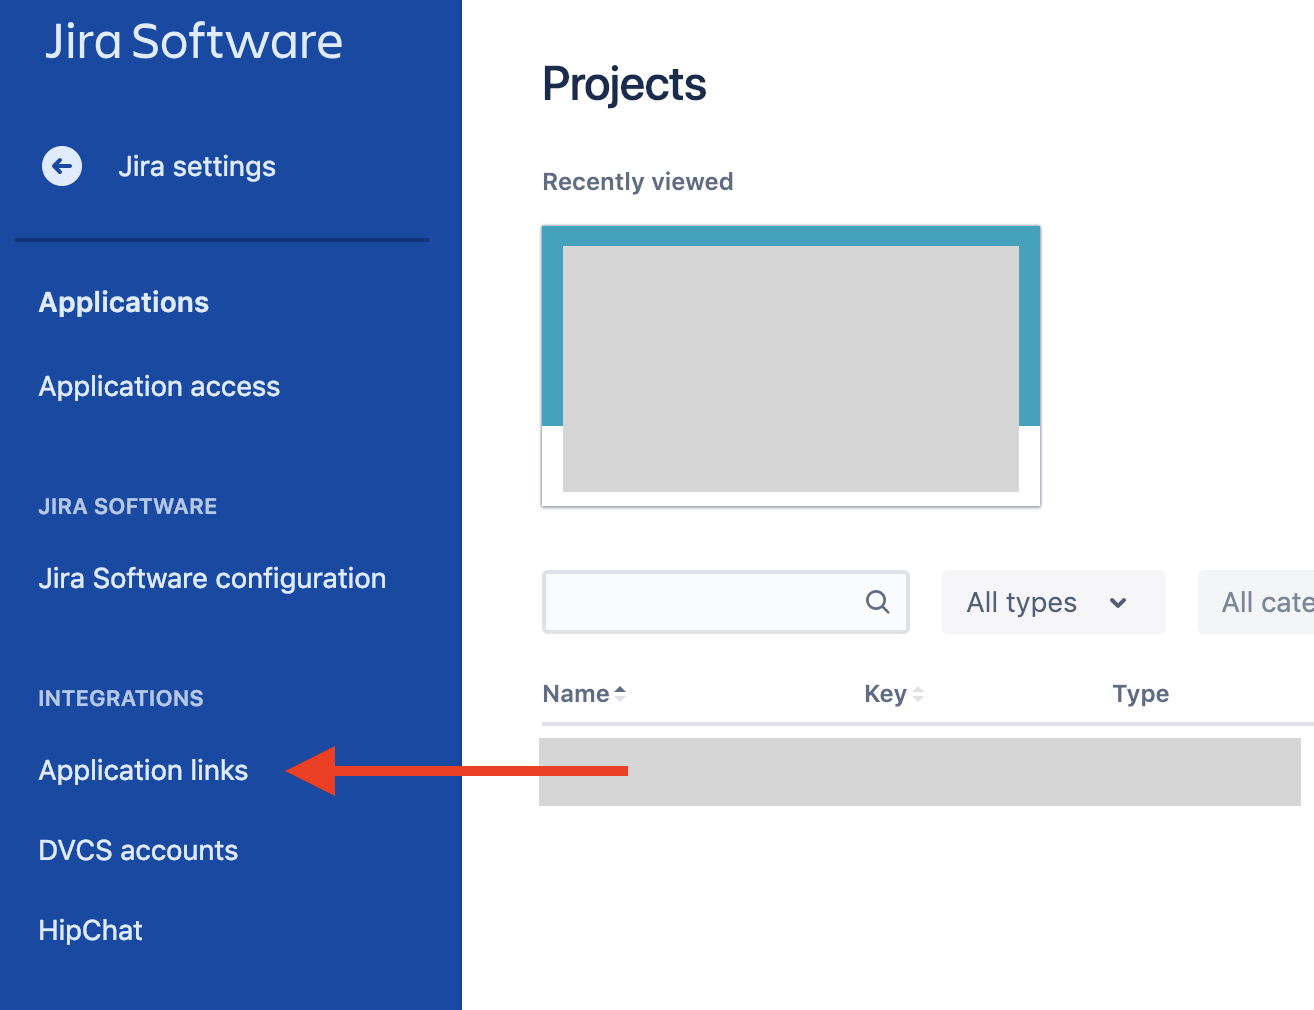
4. Click on Application Links under Integrations under the navigation menu on the left.
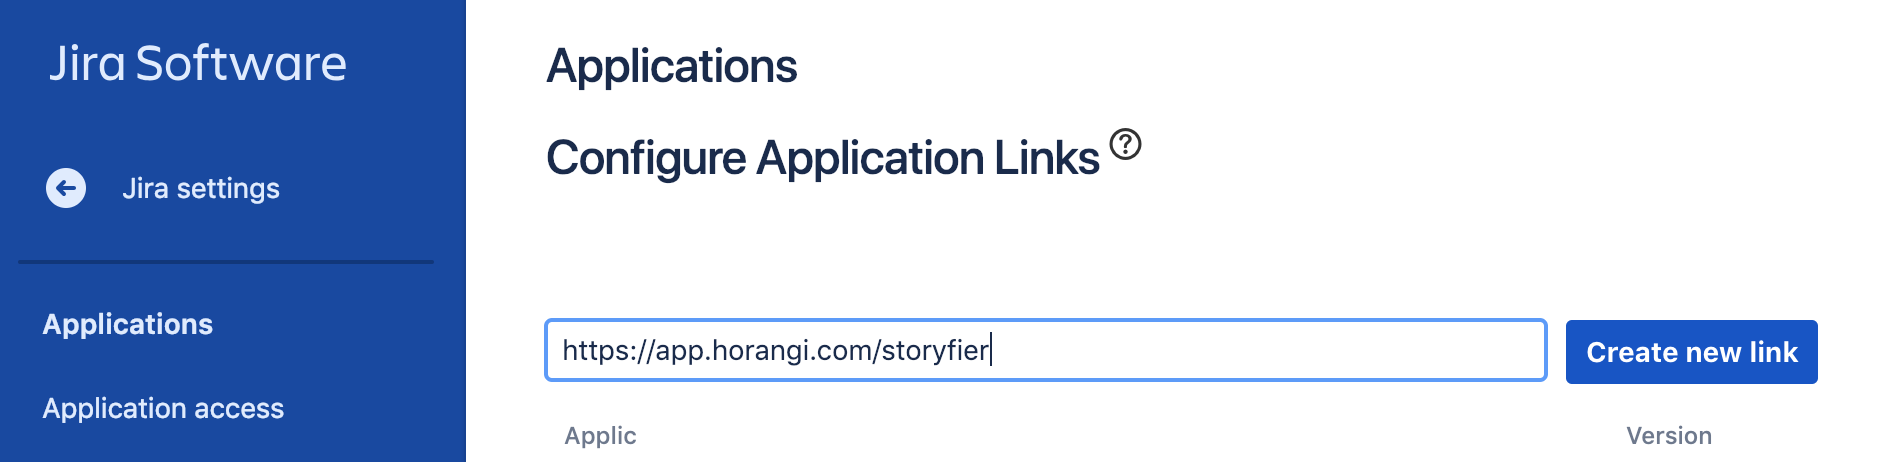
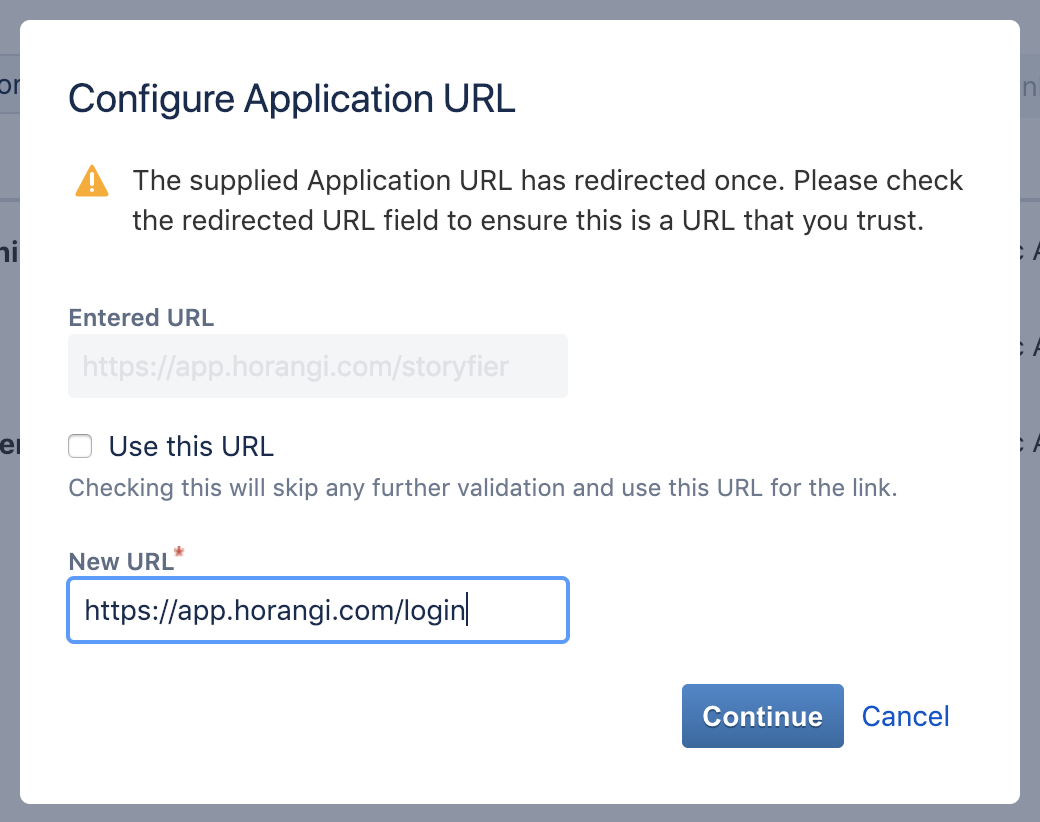
5. In the empty field, input "https://app.horangi.com/storyfier", then click Create New Link.
6. A Configure Application URL pop-up will appear. In the New URL field, fill in "https://app.horangi.com/login", then click Continue.
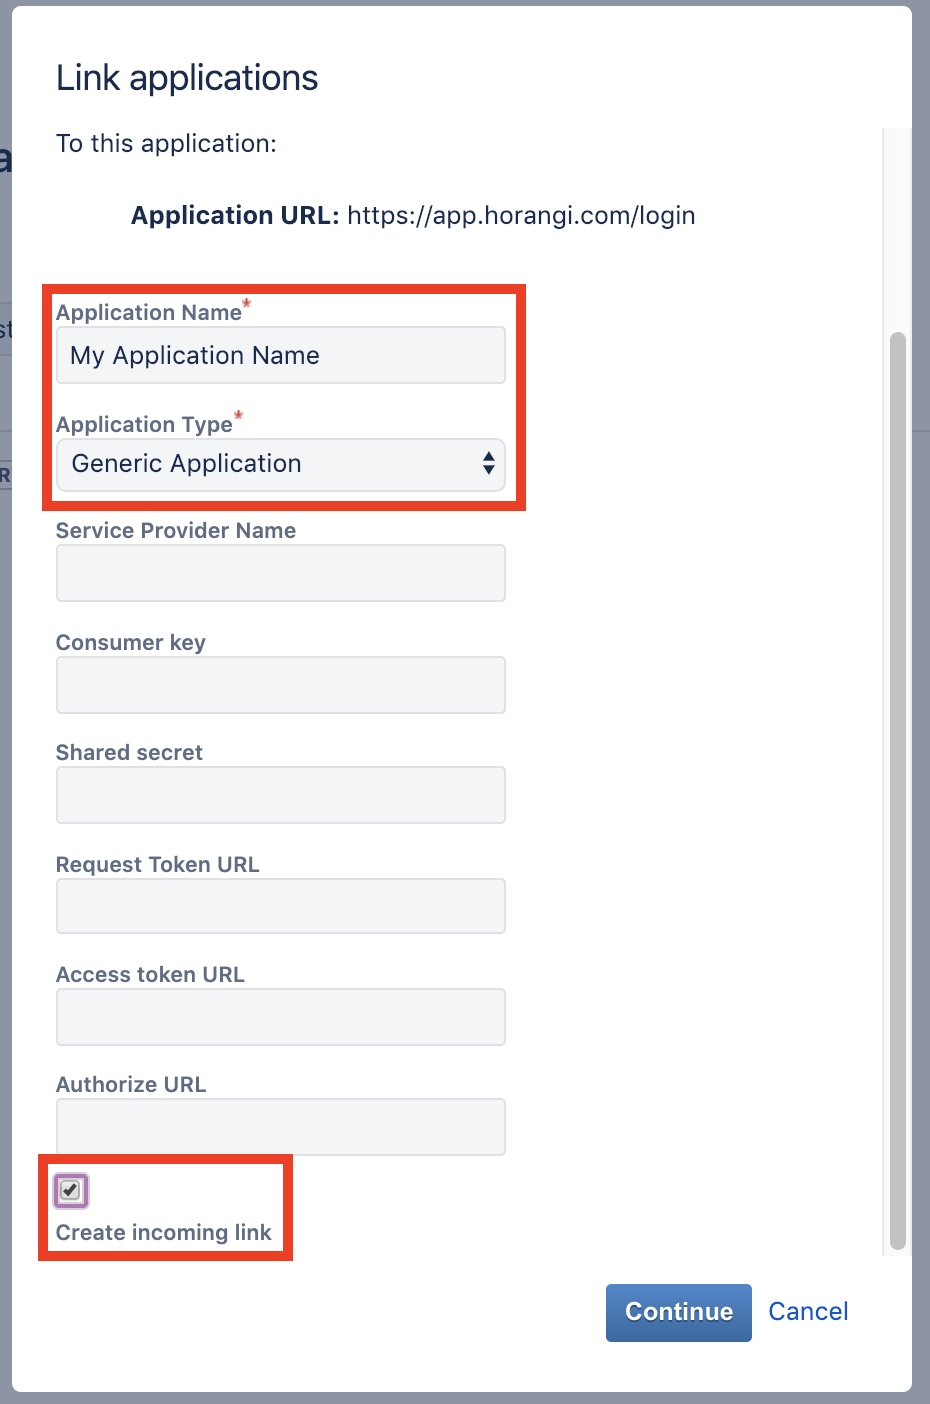
7. A Link Application pop-up will appear. Fill in the Application Name and Application Type fields as follows, and check the Create incoming link checkbox. After which, click Continue.
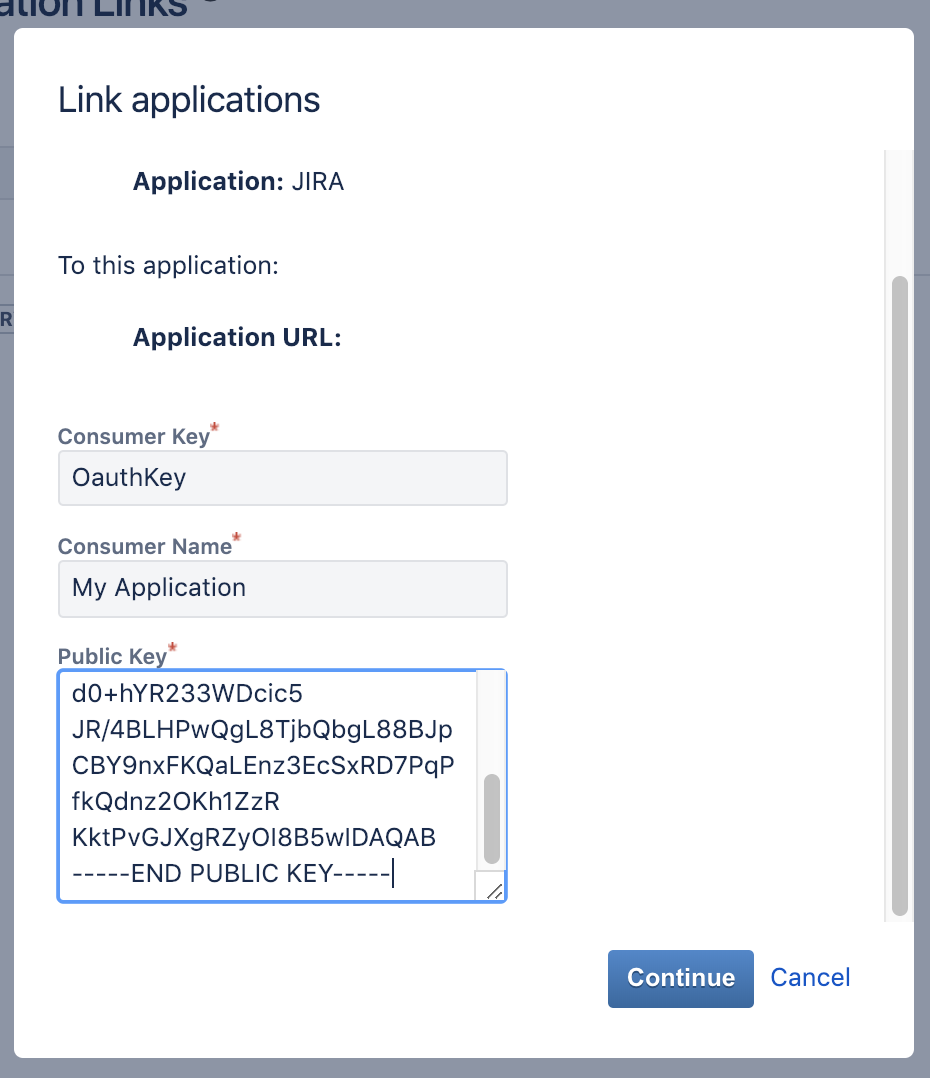
8. A Link Applications pop-up will appear. Fill in the Consumer Key, Consumer Name, and Public Key as follows. After which, click Continue.
Note: Copy all characters in the Public Key block below and paste it under the Public Key field. Please make sure there's a hard break between each lines!
-----BEGIN PUBLIC KEY-----

MIGfMA0GCSqGSIb3DQEBAQUAA4GNADCBiQKBgQDFecE1g0f+OD2m8lifk5rEUzG7
MNI7EskOFadZlkGv4+MydmIW5V0FeVlw9dUSxHc+j4KoKzgGsc4RHXmQ3m+AWW8l
dfqeCFjmdq1+zRN8y8q9WV65NuPsZKrtJu9bz7AWhuOM3+cwAOBq72+9dp85CoKB
VqnzPCsqL0G7CnqxyQIDAQAB

-----END PUBLIC KEY-----
9. Once verified, you can head back to Storyfier to integrate Jira into your scan workflows.