Rule Configuration allows you to configure Warden rules to your organization’s specific security policy. There are two main ways to configure your Warden Rules.
- Changing the default severity of a Warden Rule (available for all Warden Rules)
- Defining custom rule parameters
Changing the Default Severity
Changing a Warden Rule’s default severity sets all checks that match the Warden Rule to the severity you specify for all scans within that Cloud Account, with the exception of checks suppressed through the use of Vulnerability Management.
To change a Warden Rule’s default severity for a specific Cloud Account:
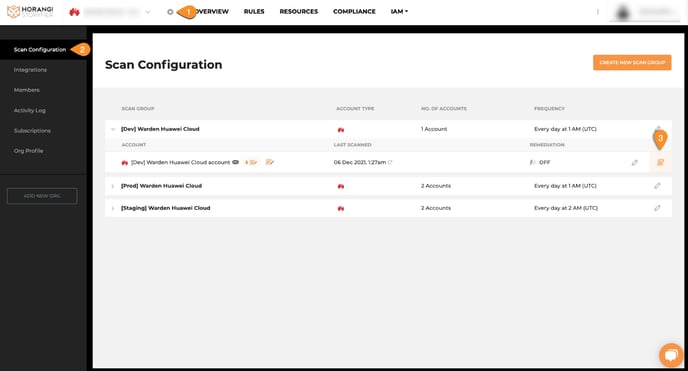
2. Navigate to the Cloud Account you want to configure Rules for and click the Scroll icon.
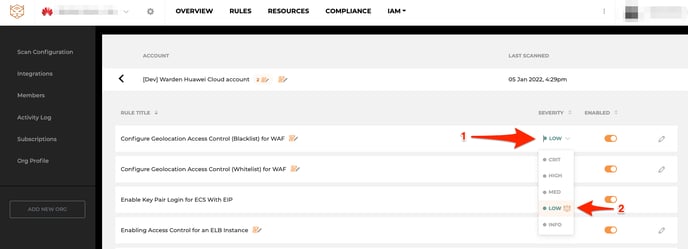
3. Go to the Rule you want to configure and click its corresponding Severity column.
4. Select the Severity you want the Rule to default to.
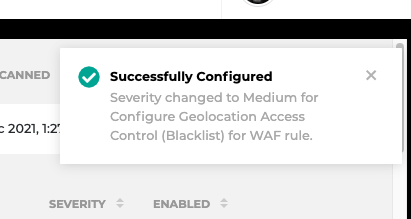
5. A notification will appear on the upper right corner indicating the successful severity change.
Defining Custom Rule Parameters
Some Warden rules allow you to configure specific parameters that the rule checks for. Some examples of parameters you can configure in configurable rules include Geolocation and IP Address range.
A Rule contains customizable Rule parameters when there’s a Scroll icon right next to the Rule title.
Defining Custom Rule Parameters is only available for the following Warden Rules:
- Configure Geolocation Access Control (Blacklist) for WAF
- Configure Geolocation Access Control (Whitelist) for WAF
- Enabling Access Control for an ELB Instance
1. Go to Settings, then Scan Configuration.
2. Navigate to the Cloud Account you want to configure Rules for and click the Scroll icon.
3. Go to the Rule you want to configure custom parameters for and click the pencil icon on the far right.
4. A sliding pane appears from the right, showing you the custom rule parameters you can configure for a specific rule.
Configuring IP Address Range Parameters
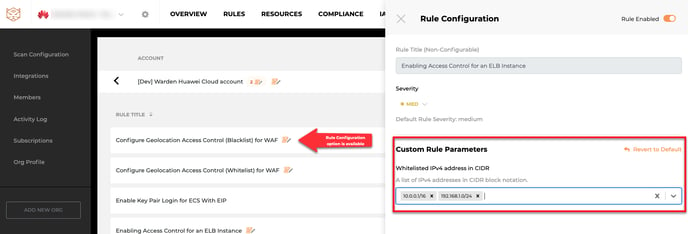
To configure IP address ranges, key in the IP address range you want to include in the scan in CIDR notation and press the comma key for every new range you want to add.
Configuring Geolocation Parameters
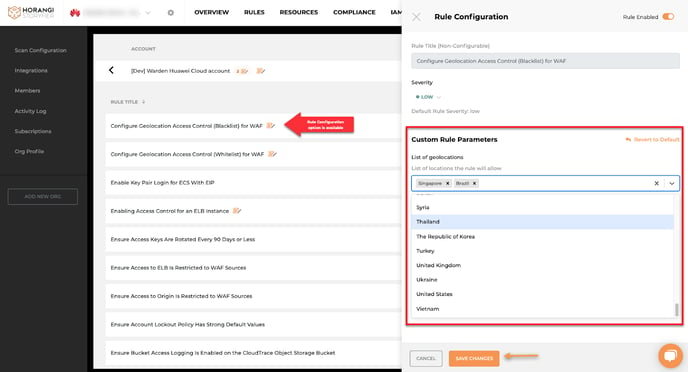
To configure Geolocation parameters, select the geolocations you want to blacklist or whitelist from the dropdown menu.
5. Click Save Changes once you’re done with configuring the rule parameters.
Any changes to the Rule Configuration will reflect on the next scheduled Scan.